Nebraskaland Magazine
Keeping kids entertained on family camping trips can sometimes be a challenge. Instead of packing extra things for them to do, create a fun craft—and souvenir from the trip—using materials gathered at the campsite. Make a dream catcher with only a few small items from home, and send the kids on a scavenger hunt for the remaining materials.
A Native American tradition, dreamcatchers were made to hang over you while you slept, in order to filter nightmares from dreams. The dreamcatcher’s webbing—symbolic of a spider’s web—catches the bad dreams, while the good dreams find their way through the dreamcatcher’s center hole, following the feathers down to where you sleep below. The center feather represents air, as breathing is a necessity of life. Though the Lakota (Sioux) are commonly credited for its creation, the dreamcatcher originated among the Ojibwe (Chippewa).
Materials to bring along:
- String, such as a cotton braiding cord—avoid plastic as it doesn’t stay in place well (approx. 7’ for weaving and 4’ for feathers)
- Quick set epoxy
- Super glue
- Scissors or a pocket knife
Materials to gather at campground:
- 3 sticks of equal length (I used 9” sticks; make sure they’re not too dry or flimsy that they’ll snap.)
- Rocks, feathers, shells, etc.
Steps:
- Arrange the three sticks into a triangle, and glue the ends together with epoxy. Allow a few minutes for the epoxy to cure before proceeding to the next step.
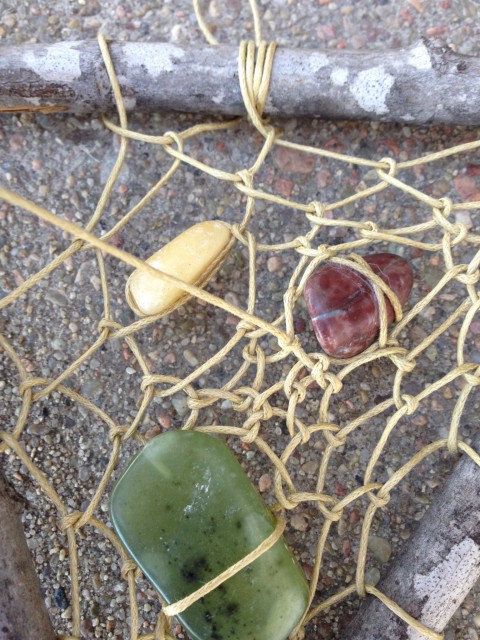
- With one end of the 7’ length of string, tie a small loop in the center of the triangle’s base, from which to hang the finished dream catcher. Tightly wrap the string a few times around the stick by the knot, and then apply a couple drops of super glue to hold the loop, knot, and wrap in place.
- Stretch the string about 1 ½” to the left of the knot. Pull the string from inside the triangle, under the stick, back over the stick and through the 1 ½” space between the new loop and the initial knot, and tighten. Keep the string taut while wrapping so that the looped section stays in place, but slightly loosen the string that’s stretched between wraps. Continue making these loops 1 ½” apart, working clockwise.
- When you reach the starting place, begin weaving the second row of the web by attaching the string to the first row rather than directly to the stick. Make a new loop at the midpoint between each of the first row loops.
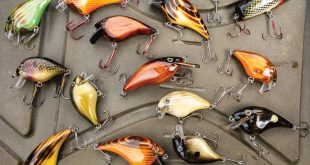
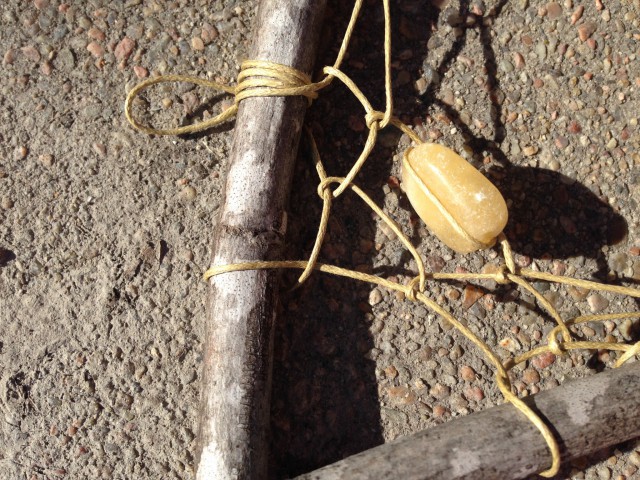
- To add rocks or shells to the web, wrap the string around the object and apply super glue to the wrapped area to keep it in place. Continue weaving. (Depending on the size of the object, you may need to skip a loop or two.)
- Once you’ve woven the web to a small inner circle, complete the row with a double knot for the final loop. Secure the knot with a drop of super glue. Trim the excess string.
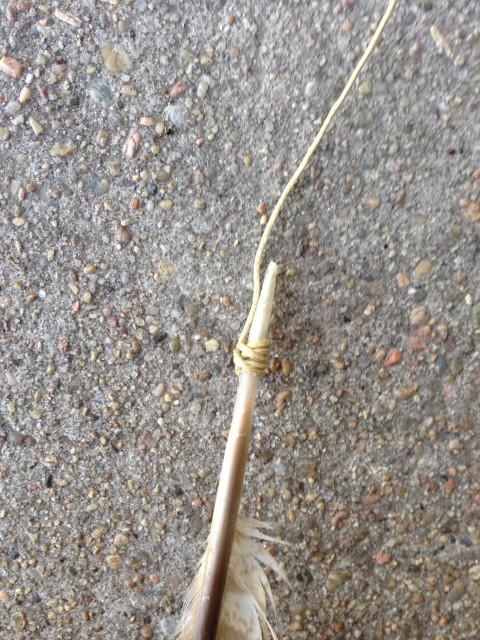
- Divide the 4’ length of string for the feathers. Wrap the end of one strand around the feather’s quill, coating it with super glue to hold. Attach the other end of the string to one of the triangle’s points by wrapping it around the bottom stick. Apply super glue to the knot, and trim the excess string. Hang as many feathers as you like; you can even super glue a couple together by their quills.